The scripts discussed in this post are all available on my GitHub repo.
At my daily job, I am currently working on the previz for a short animated film. I won’t be able to share a lot of details about the project itself now, but I am planning to do that once the film is out there in the wild.
For now, though, I would like to discuss my workflow for the previz and the simple, time-saving python scripts I have been using to speed the repetitive tasks involved in the process.
My approach to previz
First, I need to explain how I approach previz, so it is clear why I actually needed these scripts.
As someone who works mainly as an editor, I personally believe that a film is really made in the edit.
For animated films, the major editing decisions usually happen in pre-production with the stroyboards and the previz.
With this in mind, when doing previz, I prefer to treat it as if it was a live-action shoot. I start by building and blocking the scene, then film it in various ways using multiple cameras so, in the edit, I would have a wide array of choices.
For me, this means that I would need to render the entire scene multiple times, one for every single camera.
The problem with this workflow is that it involves a lot of repetitive tasks. It would be very tedious to do them manually.
The solution of course was to automate these steps.
What needs to be automated
At the start of the project, I identified two key areas that will have a lot of repetitive steps and, therefore, could use some automation.
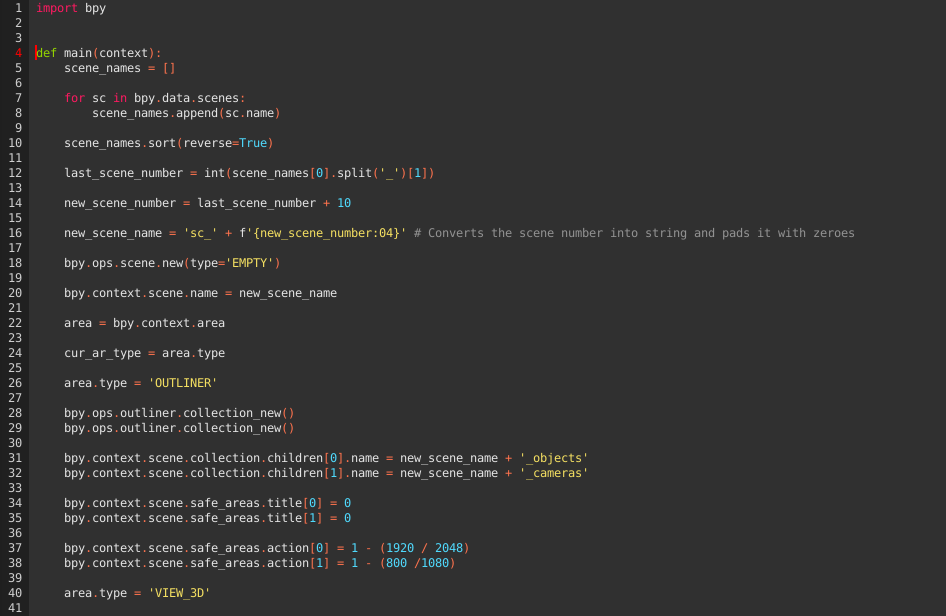
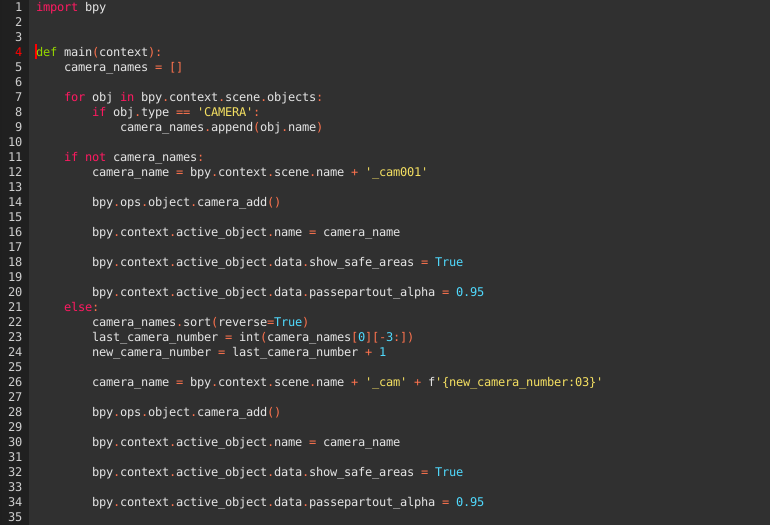
The first was creating the scenes and the cameras. I needed to make sure that, when I create a new scene or camera, its name will follow the conventions I am using. Doing that manually would be very tedious and error-prone.
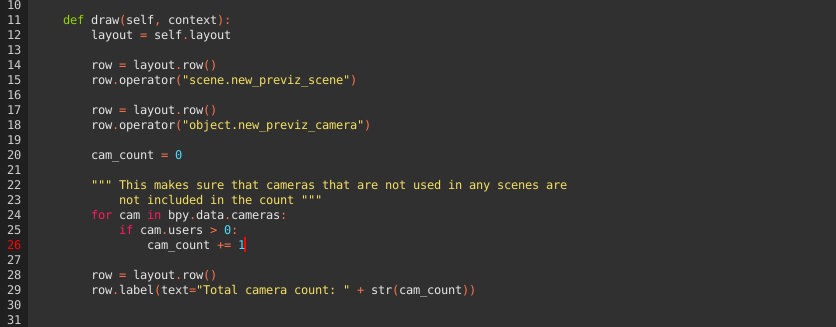
Rendering was the second area that could use some automation as I needed a way to go through a Blender file and be able to render every camera in every scene as an image sequence stored in its own folder.
Manually, that would have been a gargantuan task as my previz Blender files could have up to 30 cameras across multiple scenes. It would have been a complete waste of time to have to go to each one of these scene, switch the default camera, render it in the proper location with the correct naming conventions, and then do it over and over again for all the other cameras in the scene.
The scripts
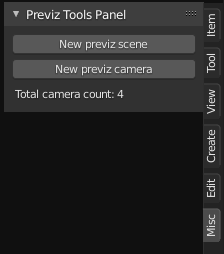
I began by addressing the scene and camera creation problem. The solution was two Blender operators: New Previz Scene and New Camera that take care of adding scenes and cameras. They take care of creating the scenes and cameras, adding scene collections, and assigning proper names.
I then added those two operators to a panel in the 3D View, so I can have easy and quick access to them while working.
Next, I created a script that goes across a Blender file finding all the scenes and storing the cameras in each one of them. It then, in a new empty scene, adds scene strips to Blender’s sequencer. Each strip represents one of the cameras.
The last script would go through these strips, rendering each one of them to the appropriate location. It can do final Cycles or EEVEE renders if required. However, for the previz, I generally use OpenGL renders as they are quite fast to finish.
And that was simply it. With just some planning and a little bit of coding, I managed to make this process go smoothly, keeping me focused on the actual creative side rather than having to constantly do a lot of house keeping.
To access the scripts and get a more technical overview of what they do and how to use them, check my GitHub repo.